Eclipse Start-Up Directions
- Getting Eclipse to shine.
Step-by-Step Instructions for Getting Eclipse to Work
Regardless of what you get done in class, I strongly encourage you to "re-try" these instructions on whatever computer you prefer using at home. This will allow you to try installing Eclipse and notice any problems with installation, specific operating system problems, etc. If you try and can't get Eclipse to work on day one talk to me the next day in class.
Starting Up Eclipse
If you haven't already done so, follow the installation instructions for getting Eclipse installed here. Remember to get the cs1.jar package downloaded as well. Once you've got those installed and ready to go, it's time to run Eclipse. The download should have left a folder called "eclipse" at the location you chose. Inside that folder is the purple rectangular icon for the Eclipse program. Double-click that icon to start the application. Once you've done that, Eclipse should have a pop-up window requesting that you select a workspace.
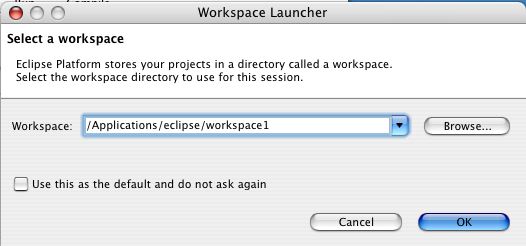
This will be a folder where Eclipse keeps track of all the code you will write. Choose a name you like and remember where that workspace is saved for future reference. If you don't have the option of choosing a workspace you'll have to set your workspace from one of Eclipse's menu options. Under the File menu header there should be an option to "Switch Workspace". That's what you want. The best workspace location will probably be on your network drive provided by Duke so that you can save your work and access it remotely. Once you've selected a workspace (going back to the initial pop-up window choice), click the "OK" button to continue. That should get you to the main Eclipse window:
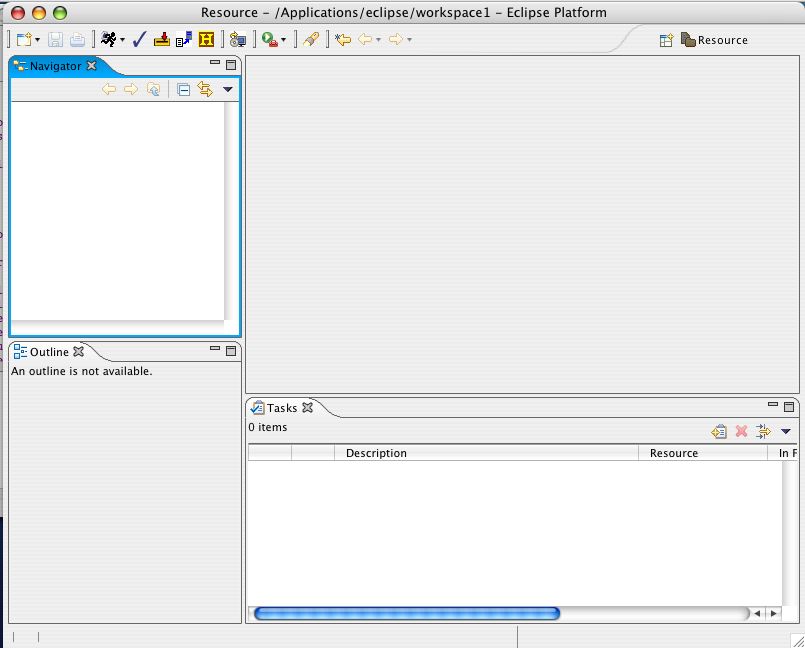
There may be a "Welcome" bar on the right side of your window. It can be ignored or closed by clicking the "x" next to the title "Welcome". Start to create a new project by choosing from the menu bar: File -> New -> Project. That should bring up a window like this:

Creating a Project
Among the options for "Wizards" choose "Java Project" and click "Next". In this next window, you'll choose a project name. I chose firstProj and you should do the same to have an easier time following these instructions. I've already mentioned classes and methods as part of Java programs. Recall that methods were contained in classes and each class was given its own file. A project is a collection of classes (and their respective files) and they generally form a single program. These distinctions are similar to stating the location of the city that you're in by Country and State. Your location right now is probably USA, North Carolina, Durham. Similarly, you can designate code by the project, class, and method it is contained within. After you've entered the name for this project (firstProj), click "Next". Your window should now look like this:

In this window choose the "Libraries" option from the bar towards the top. With that selected, choose the "Add External JARs" button at the right of the window. This will allow you to search for an external ".jar" file, and you're going to be looking for the cs1.jar file you downloaded. Once you've located and highlighted that file, click the "Open" button and that should add it to the list of "JARs and class folders on the build path given on the left of the screen. There should be only two:"cs1.jar" and "JRE System Library". With these added to the build path, click the "Finish" button. Now, you may or may not be confronted asking if you want to switch to the "Java Perspective". If Eclipse asks, click "Yes" to change to that perspective. You can also check the box to have it "remember your decision" if you like.
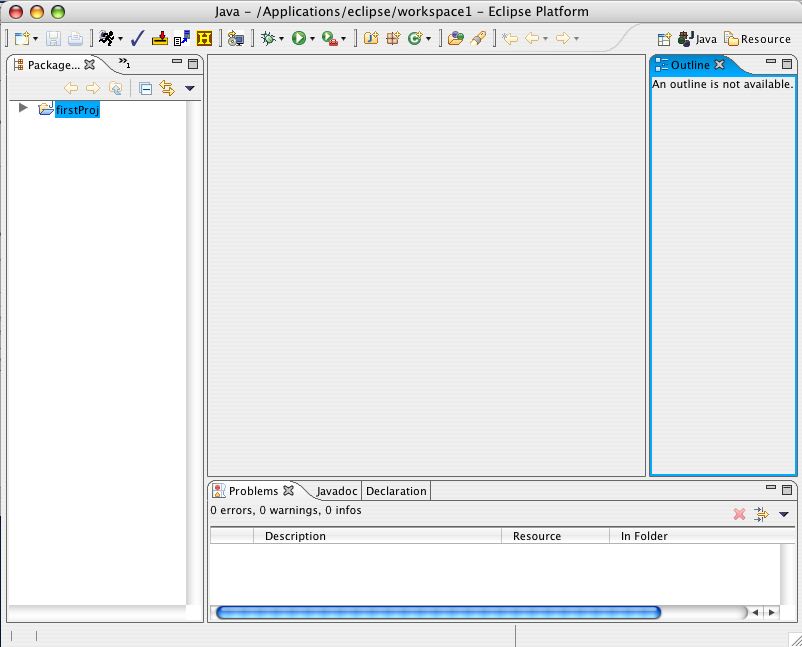
You should now finally be pack to the main Eclipse window with the project that you added (firstProj) included in the list at the left of the screen as shown below.
Creating a Class
Now all we need to do is add a class to your project to actually hold some code. Return to the "File" menu from the top menu bar and choose File->New->Class. You should get a window like this:
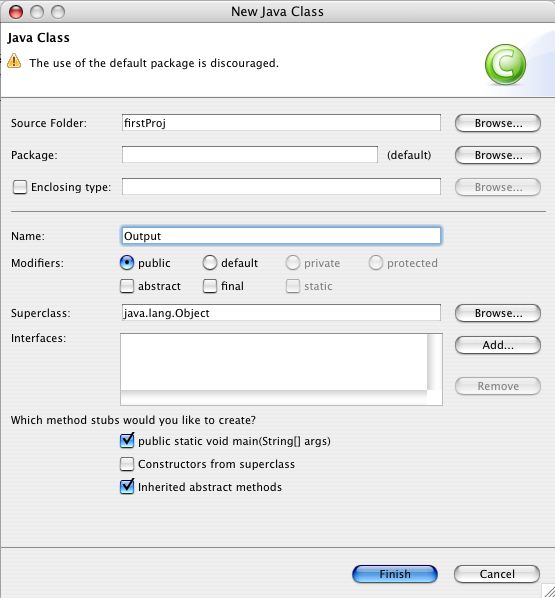
The top textfield titled "Source Folder" chooses the location and project you are adding this class to. The fourth textfield down titled "Name" chooses the name for the class you're creating right now. It also chooses the title of the file the class will be placed into. For the sake of simplicity, choose the name Output. With this name, it will be placed into a file called Output.java in the firstProj project folder. Leave the other options the same, except for checking the "public static void main(String[] args)" as a method stub you'd like to include. When these options are chosen, click the "Finish" button at the bottom. This should result in you getting a window looking like this:
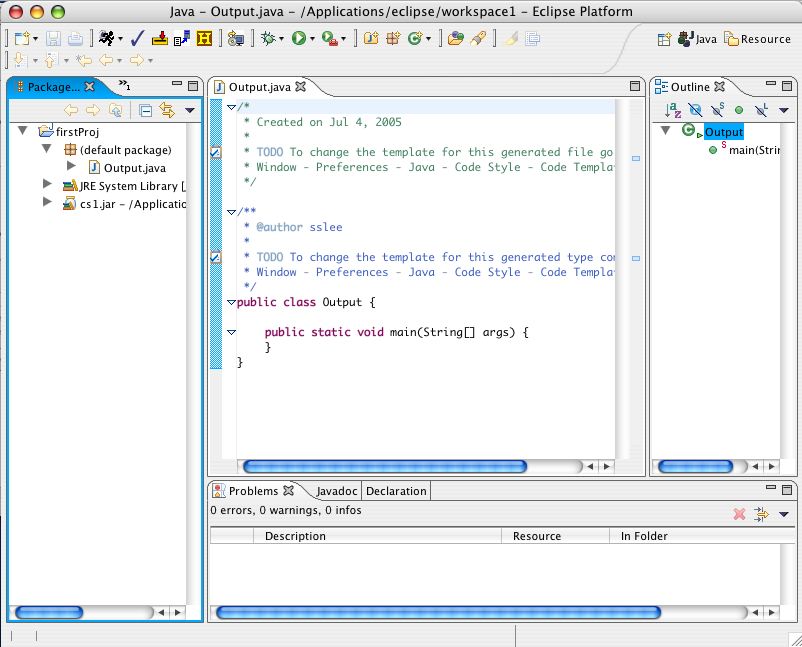
If you don't get a window like the one shown above, make sure that you've selected the class you just created. Under the "Package Explorer" tab in the left of your window there should be a folder with your project name (it should be firstProj). Like with directory menus you may have seen before, you need to click the arrow to the left of that name to get it to point down and reveal what is in your project folder. One of the things in the project folder should be "(default package)" and when it's arrow is down it should reveal the class that you created (which should be Output.java). Double-click on the class name to open that file if it is not open already.
Outputting Text
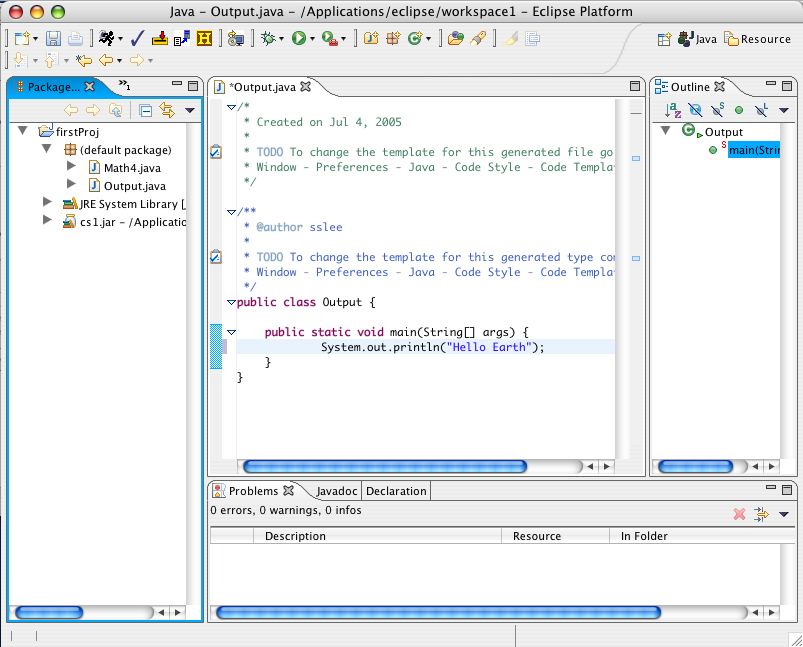
With your class file opened and the code showing, we're ready to add a "println" statement so that your code can output something. Inside the main method of your code, add the line:
System.out.println("Hello Earth");
Remember that this is how you can output text to the standard output console. With the line added, your screen should look like this:

Running Your Program
Now with your class file complete, the last thing to do is compile and run it. From the top menu bar select Run->Run As->2 Java Application. If Eclipse asks, click "Ok" to save all resources. What should you do if 2 Java Application doesn't seem to be an option you can choose? (Indicated by its text being lightened to a gray color.) The answer is to make sure Output.java is highlighted in your "Package Explorer" tab. This lets Eclipse know which file you want to run.
Next, if there are no compilation errors, the text Hello Earth should appear in the console window found just below the code of your class. If you don't see that text (and there weren't any errors reported) then make sure the "Console" tab is selected if there is more than one tab at the bottom. With this working, you've just created and run your first Java program (at least your first for this class).
Using Existing Code
There's one other simple way to add a class to your program. Download the Math4.java example I used in class and move it to the project folder for the project you created. (You may have to hold down the control key on a Mac or right-click on a PC to download that file.) Now, click and drag that file over the "(default package)" icon in the "Package Explorer" menu in your Eclipse window. Holding the file there should bring up the copy icon (usually a green circle with a white plus sign on it). Use this to copy the Math4.java class to your project. The file should now appear under the "(default package)" label as shown below:
Double-click the Math4.java label to highlight it and open that file. With the code for that file showing, choosing to run your Java application should run it instead of your Output.java file. Again, you run your Java application by choosing from the top menu bar Run->Run As->2 Java Application. Note that the Math4.java file will only run if you successfully included the cs1.jar file as an external JAR file when you first opened Eclipse.
That's it for getting Eclipse started. Now you should be ready to start writing more Java programs of your own.