Directions for setting up Anaconda Python and PyCharm IDE
These directions will guide you through the installation of Python using Anaconda, the installation of the PyCharm IDE, and the creation of a “Hello World!” project in PyCharm.
Contents
- Installing Python 3.9
- Installing PyCharm
- Creating and running a new Python project in PyCharm
- Opening and editing an existing Python project in PyCharm
Installing Python 3.9
For this course we will be using Python 3.9. These instructions will be written to reflect the latest version of Python 3.9, which at the time of this tutorial is 3.9.7.
We will be installing Python 3.9 using Conda, an open-source package manager that creates and manages Python environments on your computer.
Conda is included in an installation of Anaconda, an open-source Python/R data science platform. Conda can alternatively be installed with Miniconda, a lightweight Python wrapper of Conda. This tutorial will walk you through an installation using Anaconda, which is easier and more straightfoward.
1. Install Python 3.9 using Anaconda
Download the Anaconda Python 3.9 installer for your operating system here.
Depending on your platform, the instructions to install Anaconda will be graphical or command-line; whichever method you prefer is fine as long as it compatible with your system.
- Windows: Choices include a 64-bit or 32-bit Graphical Installer (unless you have an old version of Windows, 64-bit is probably the right choice)
- macOS: Choose the installer that matches your operating system architecture (Intel or Apple Silicon). Choices include a GUI or Command-Line Installer.
- Linux: Choose the installer that matches your operating system architecture (e.g., x86 or Power8/Power9)
2. Verify Conda successfully installed
Once installed, open the Terminal (Mac) or Anaconda Prompt (Windows) and test that Anaconda was successful in installing Conda by entering the command conda --version. Your terminal output should look similar to the following
(base) $ conda --version
conda 4.11.0
The (base) indicates the current Python environment is currently set to the base environment installed with Anaconda/Conda. Which means that the current Python version should be set to Python 3.9. We can check this with the command python --version:
(base) $ python --version
Python 3.9.7
Next, check that the Python path is set to Anaconda’s using the command which python (Mac):
(base) $ which python
/Users/compsci260/anaconda3/bin/python
or use the command where python (Windows):
(base) C:\Users\compsci260\> where python
C:\Users\compsci260\Anaconda3\python.exe
Note that if using the GUI installer, the path will be a little different: /Users/compsci260/opt/anaconda3/bin/python.
3. Setup a Conda environment for COMPSCI 260
With this (base) environment of Python 3, we are ready to build Python 3 projects. However, for practical reasons, we will want to create an environment specifically for this course. Create a Conda environment named compsci260 using the conda create command.
conda create --name compsci260 python=3.9
You will be prompted to install packages into this environment. Confirm and proceed by entering y.
Verify that your Conda environment has been installed by listing out the available Conda environments using the command conda env list:
(base) $ conda env list
# conda environments:
#
base                  *  /Users/compsci260/anaconda3
compsci260               /Users/compsci260/anaconda3/envs/compsci260
We’ve successfully created the compsci260 environment and we can switch to it using the conda activate compsci260 command.
(base) $ conda activate compsci260
(compsci260) $
We can also switch back to the base environment using the command conda deactivate.
In the subsequent parts, we will show you how to integrate your compsci260 environment into Python projects with PyCharm.
Installing PyCharm
Although students are may use whichever IDE they are comfortable with, we recommend (and provide instructions and support for) the PyCharm IDE from the company JetBrains.
(Optional) Obtain a license for PyCharm Professional using your student email
With an .edu email, JetBrains allows students to obtain many products for free, including the Professional version of PyCharm. Link available here. The Professional version is not required over the Community version for the purposes of this class, but PyCharm Professional provides additional features that you might later benefit from having access to, including a profiler, scientific tools, and web development integration.
Download PyCharm
Download and install PyCharm for your operating system. Link available here.
Creating and running a new Python project in PyCharm
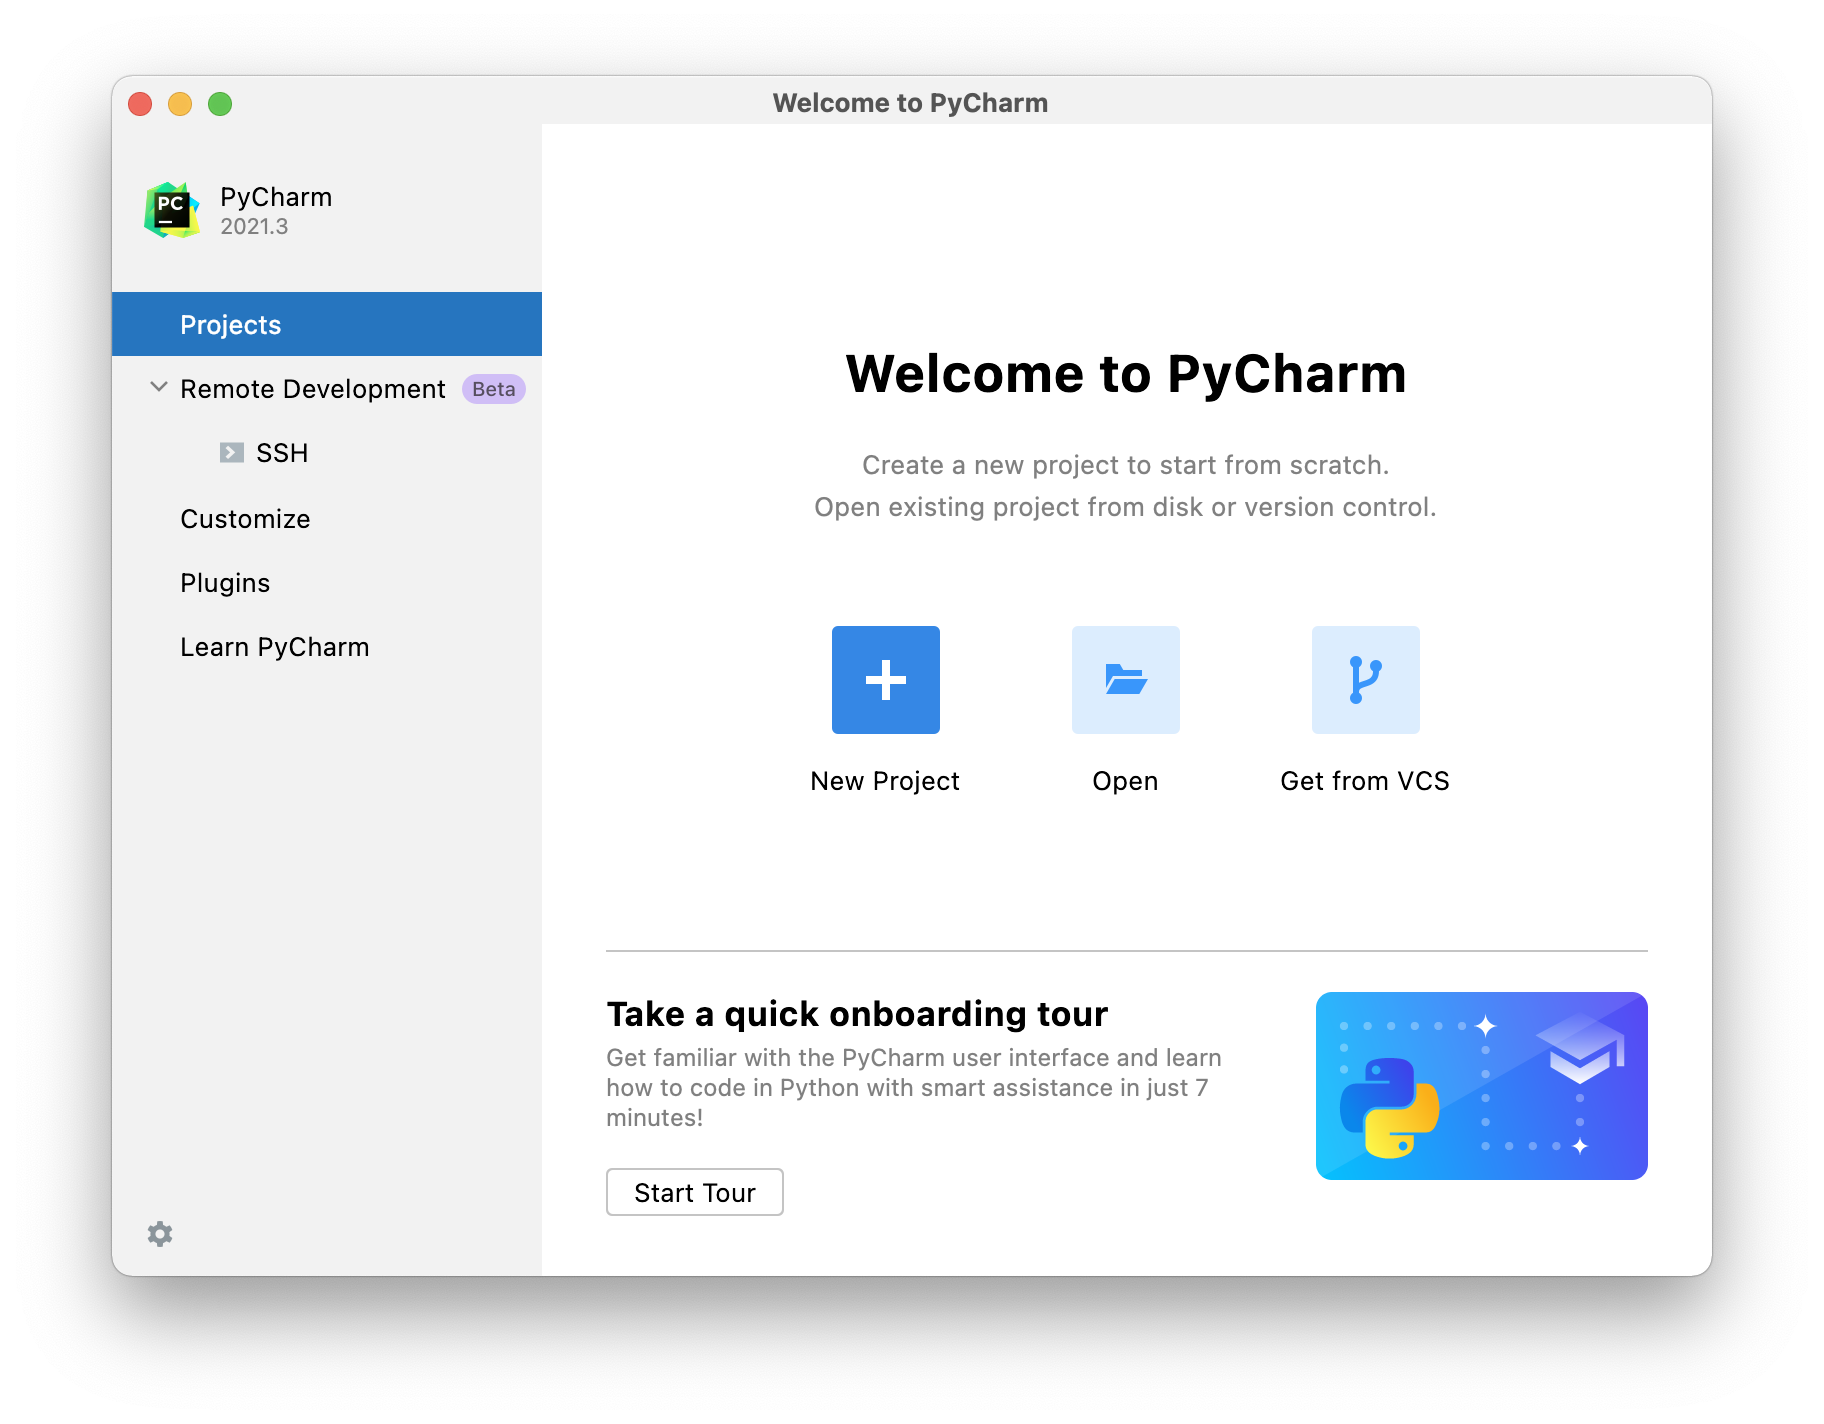
Open the new installation of PyCharm and select New Project:
Select Pure Python project and specify a location to create the project. In this example we chose to create a directory named HelloWorld.
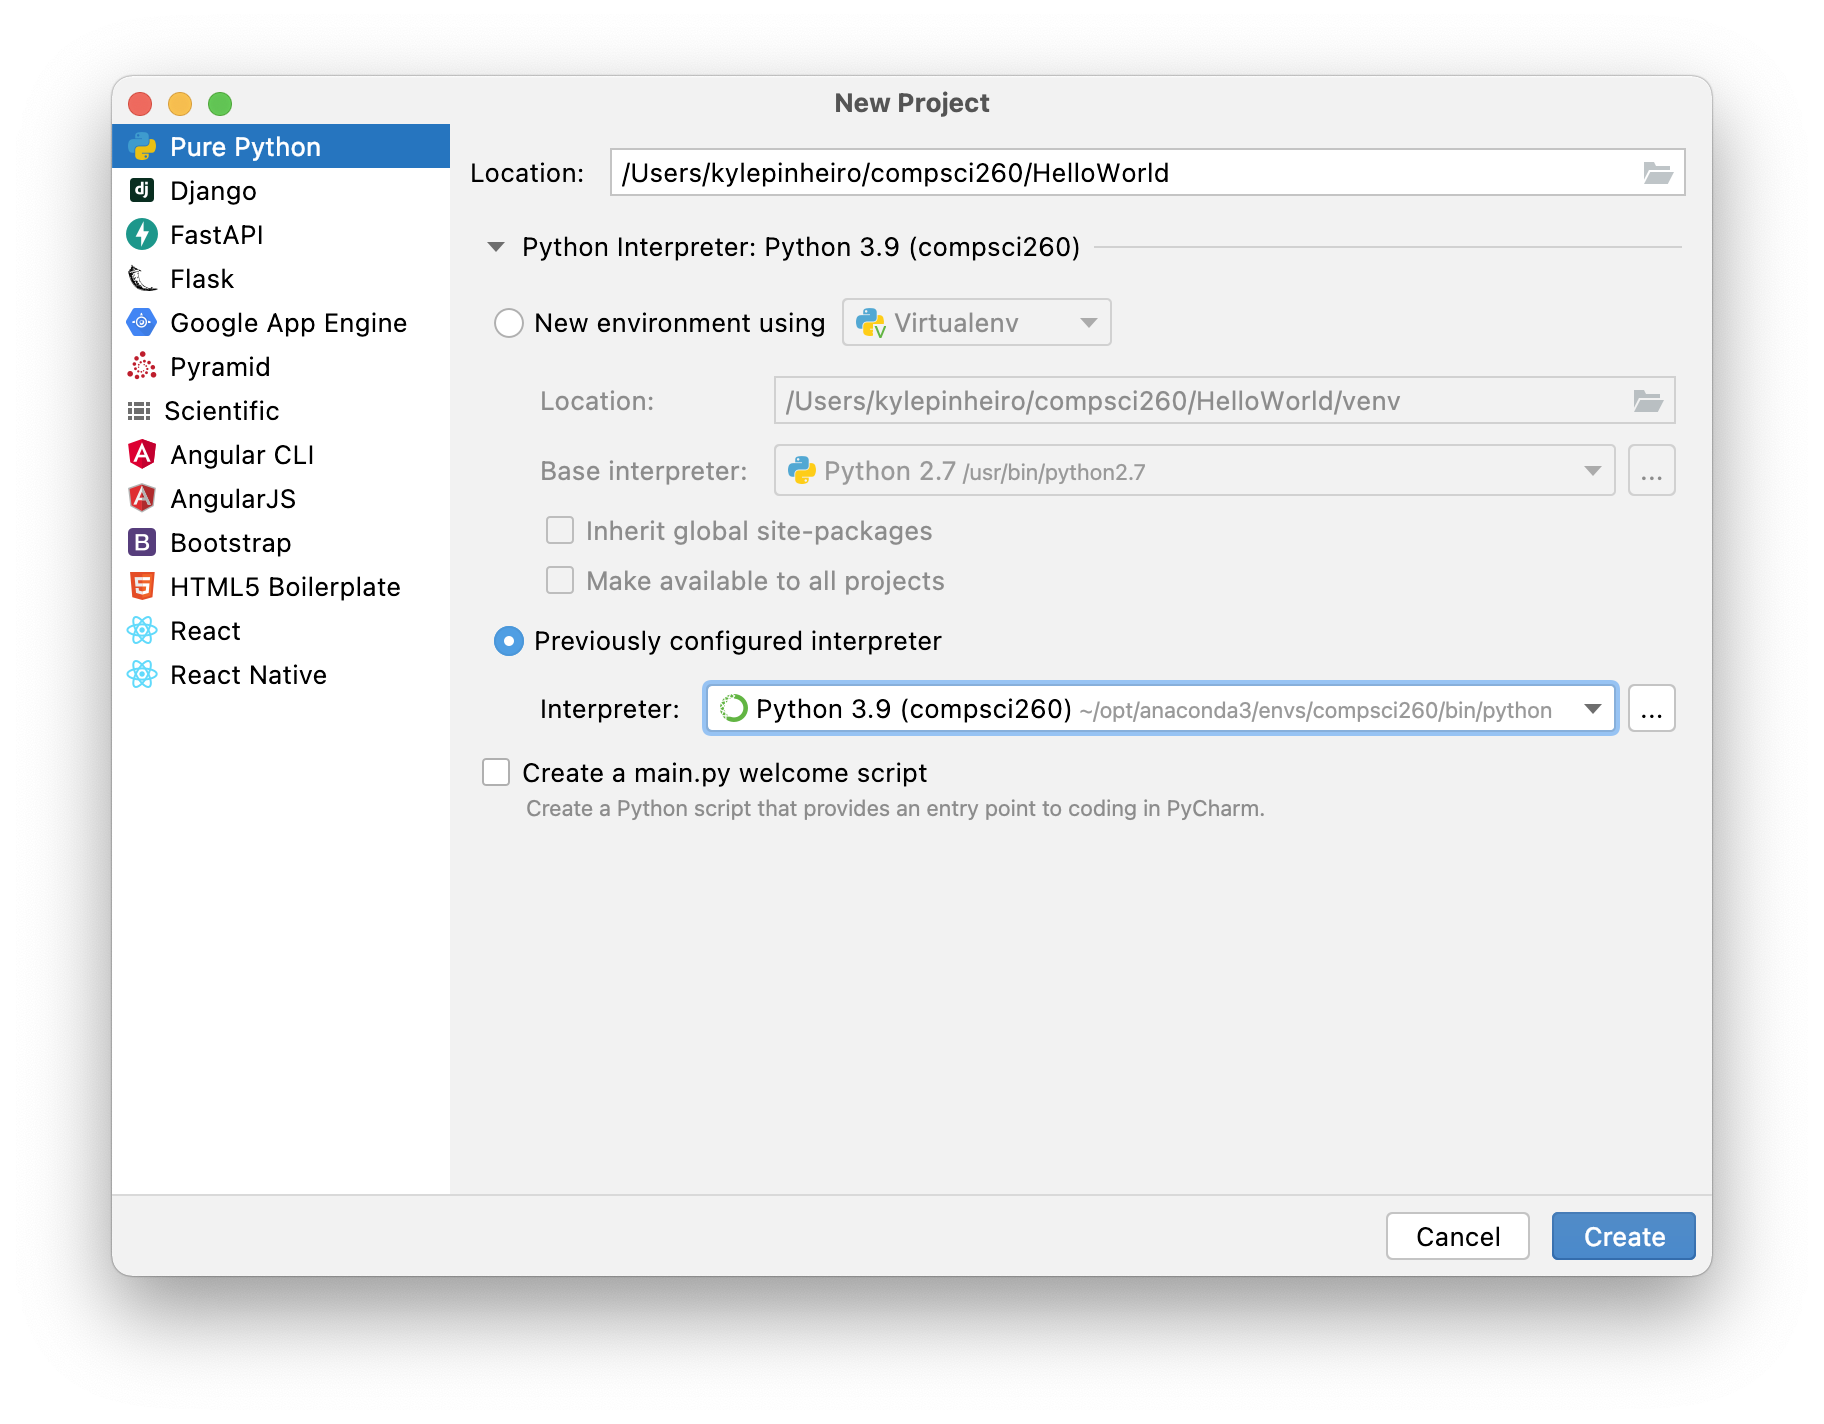
Next, we will need to setup the project to use our Conda environment’s Python interpreter. Select Previously Configured Interpreter and navigate to the add interpreter view with the ... button:
Add the Python interpreter from the compsci260 conda environment we setup earlier. Select Make available to all projects for future projects. Select OK, then Create to create the new project.

Tip: If you can’t find the path to the Python executable, activate the environment in a terminal using conda
activate compsci260 and find the python executable path with which python (Mac) or where
python (Windows).
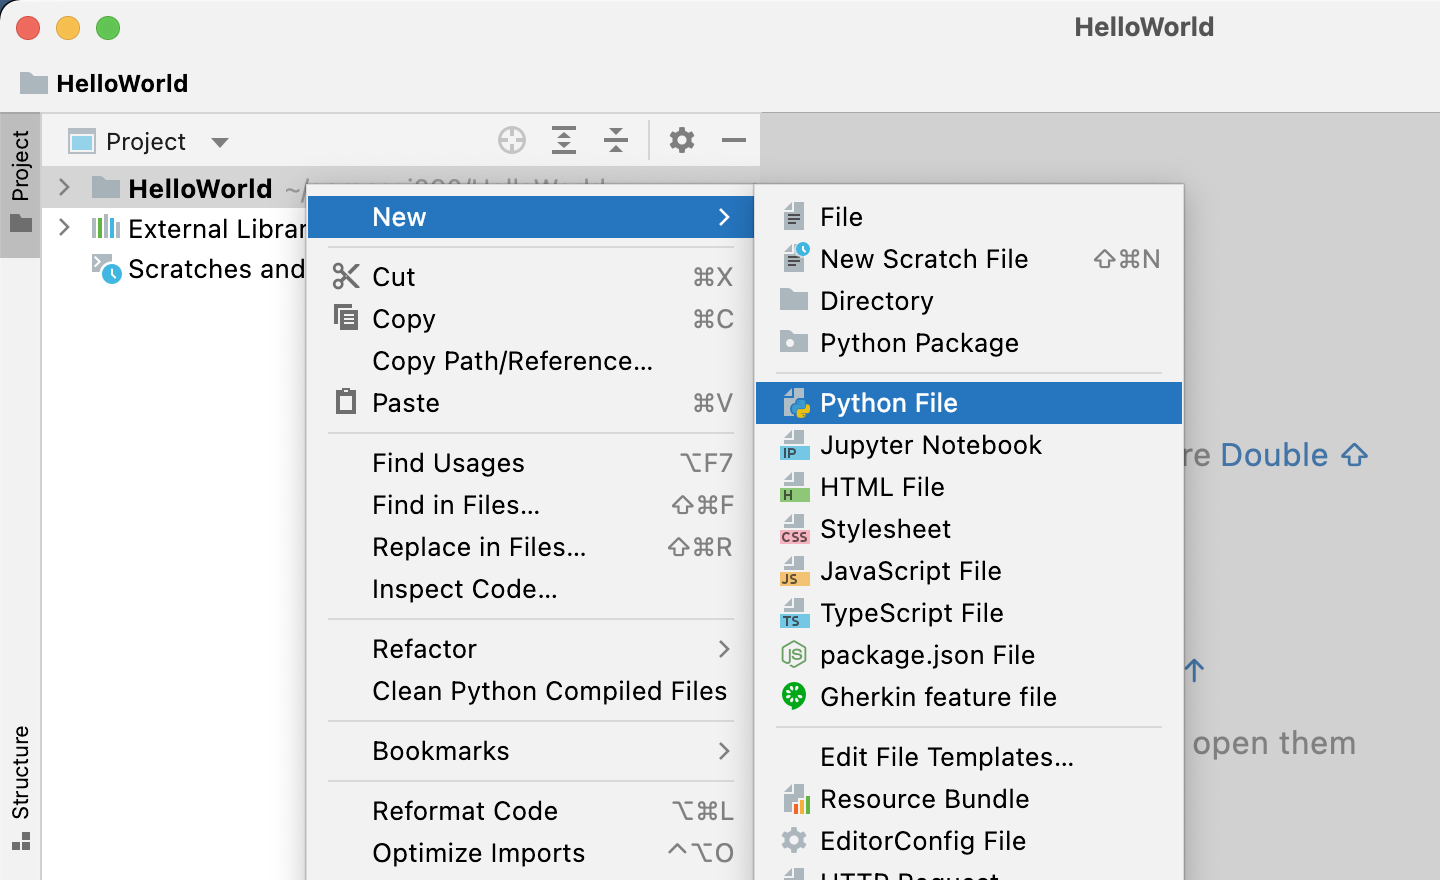
Now create a new Python file in the project by right-clicking the HelloWorld project, selecting New and Python File. Call this file hello.py
In the body of the file type:
print("Hello World!")
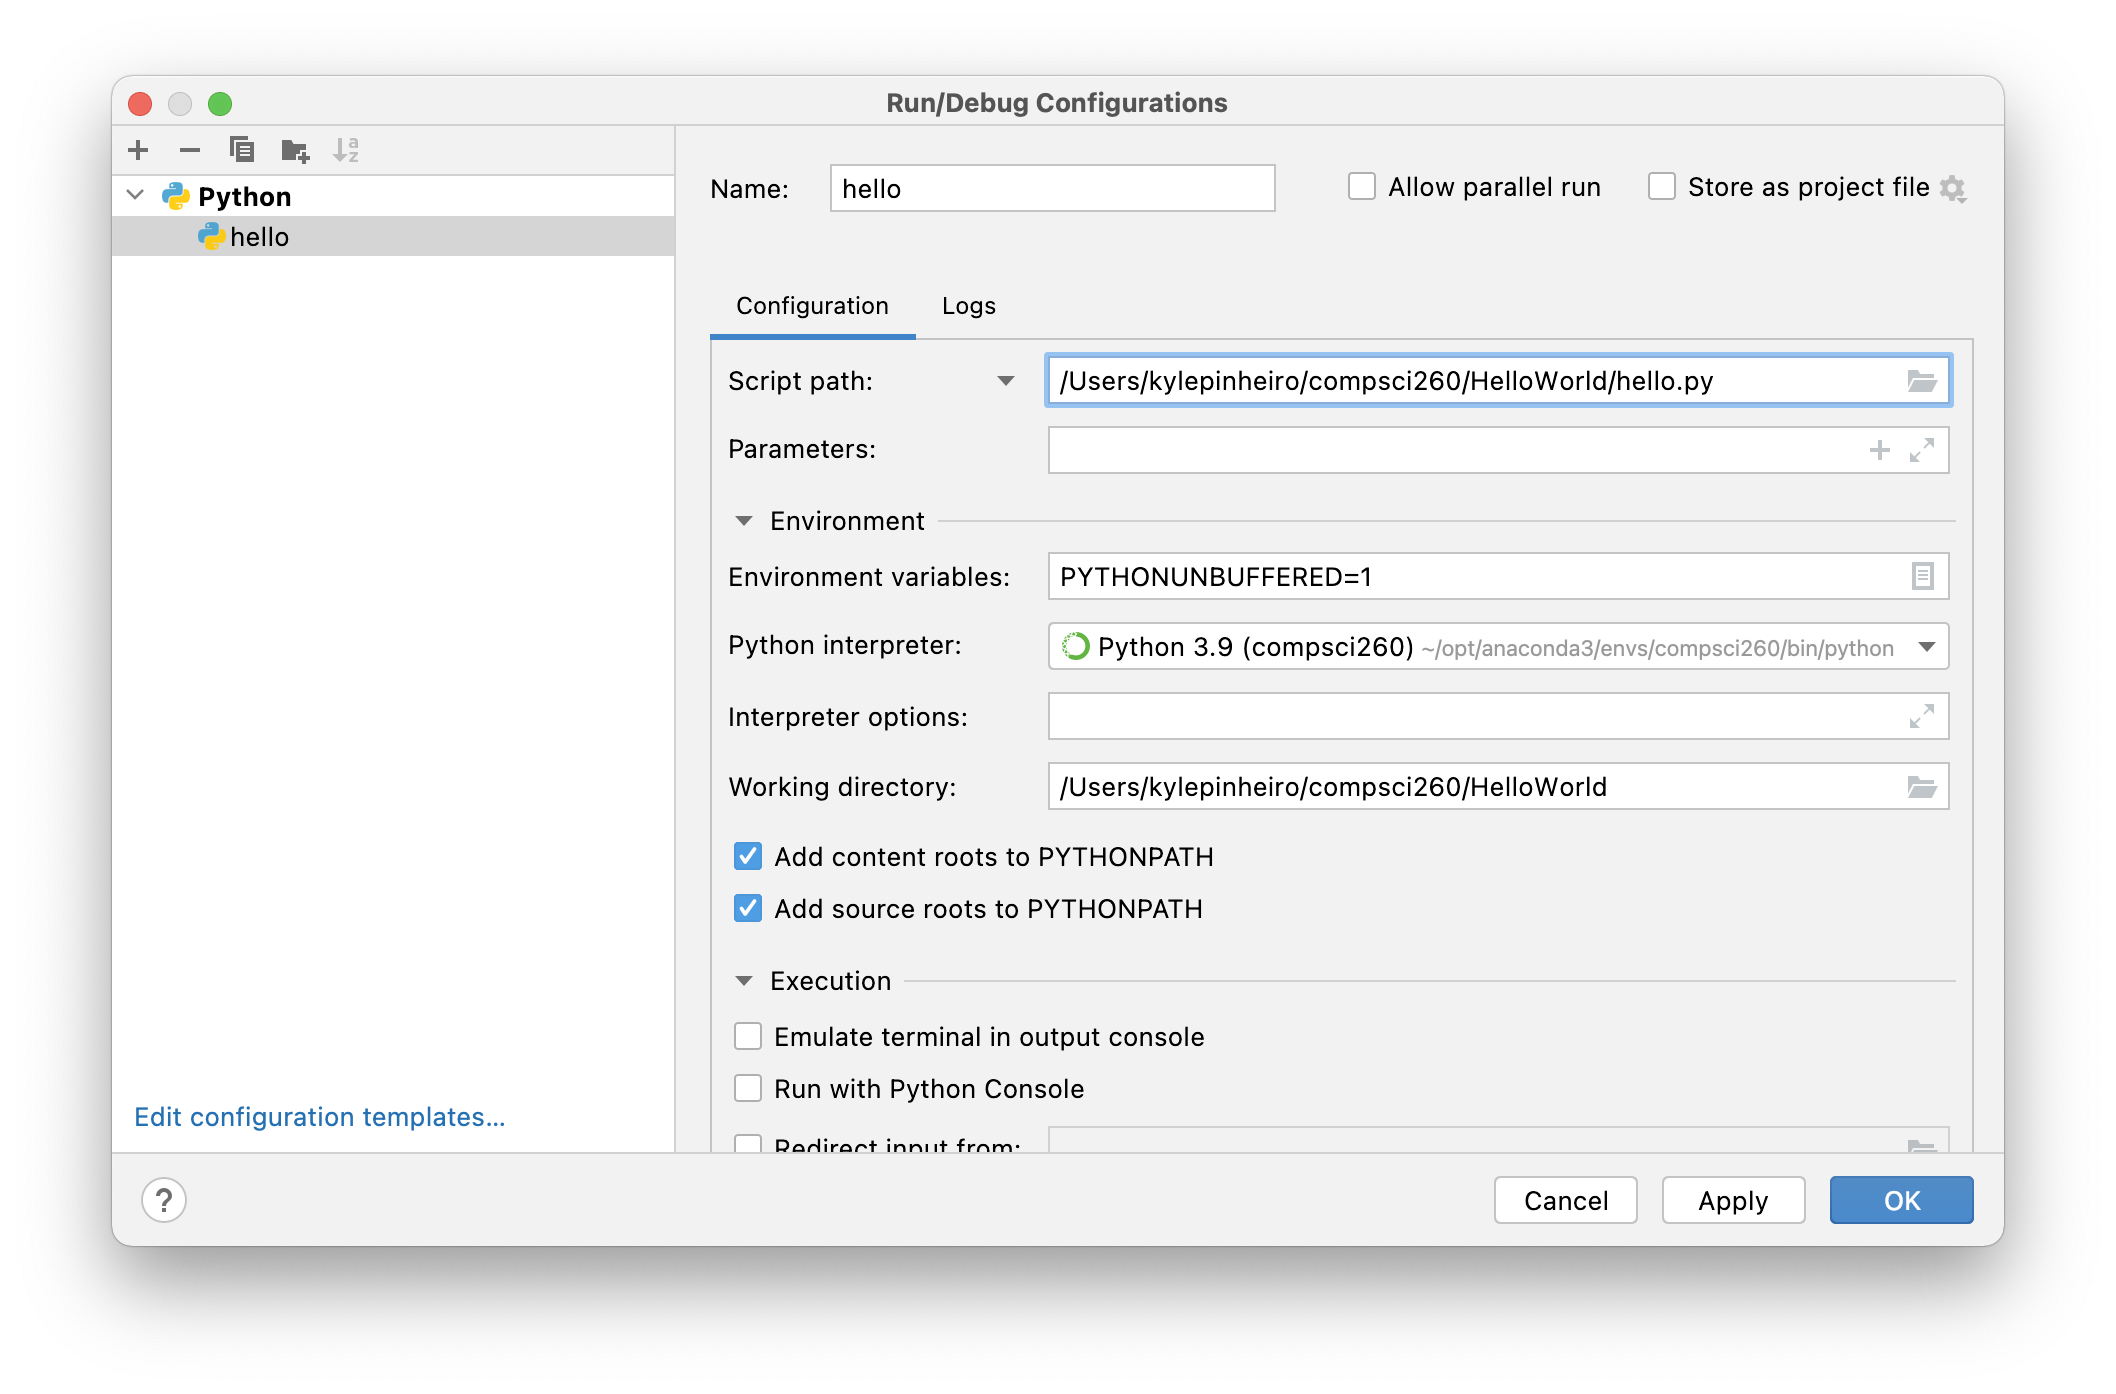
Before we can run, we need setup a run configuration to define how we will run the project. From the menu, select Run -> Edit Configurations:
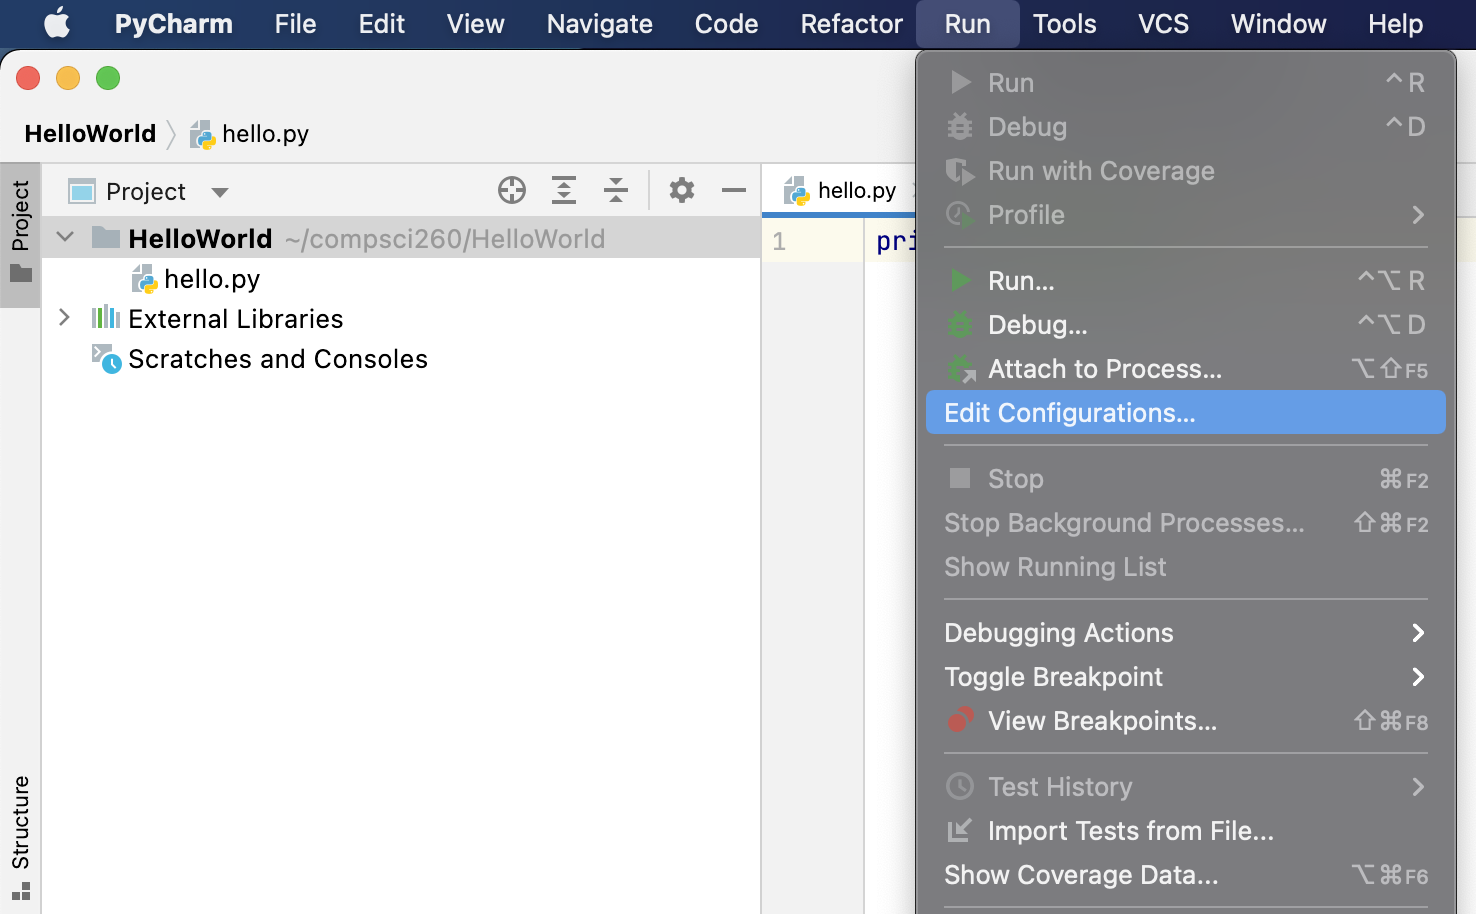
Select the + sign (top left corner) and add a new Python run configuration. In the script path, navigate to the hello.py we just created. The Working Directory should also auto-populate with the project’s full path. Verify the Python Interpreter is version 3.9 from our compsci260 environment. Select OK.
In the menu, select Run -> Run 'hello'. The Python script will execute and the console should output:
/Users/compsci260/anaconda3/envs/compsci260/bin/python /Users/compsci260/HelloWorld/hello.py
Hello World!

Process finished with exit code 0
Congratulations! You’ve run your first Python project in PyCharm using a Conda environment.
Opening and editing an existing Python project in PyCharm
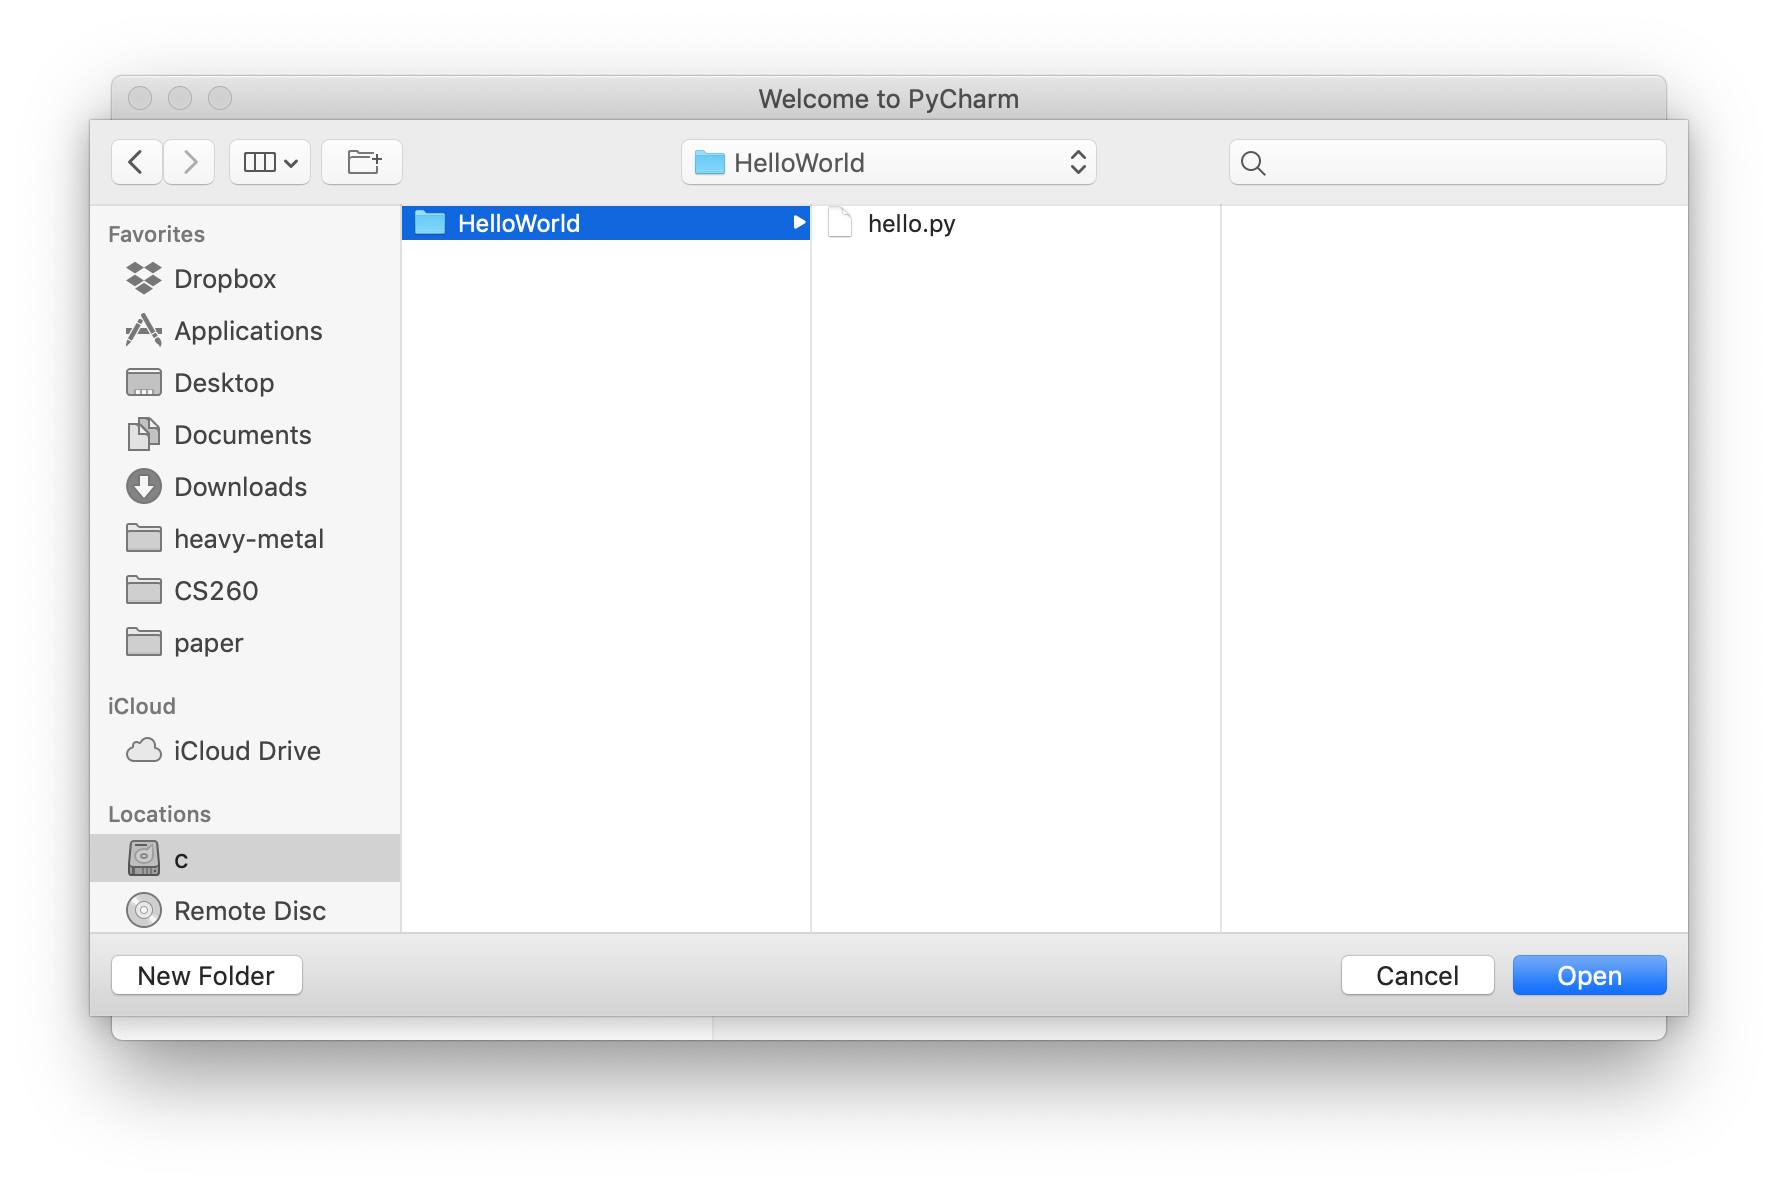
Opening an existing Python project is very similar to creating a New Project. Close any open PyCharm windows and the Welcome to PyCharm window should appear.
Select Open and navigate to an existing projects directory and select Open. Ensure you are opening the directory not a specific Python file in the directory.
If this it the first time opening the project in PyCharm, we need setup a run configuration to define how we will run the project. From the menu, select Run -> Edit Configurations:
Select the + sign (top left corner) and add a new Python run configuration. In the script path, navigate to the hello.py we just created. The Working Directory should also auto-populate with the project’s full path. Verify the Python Interpreter is version 3.9 from our compsci260 environment. Select OK.
In the menu, select Run -> Run 'hello'. The Python script will execute and the console should output:
/Users/compsci260/anaconda3/envs/compsci260/bin/python /Users/compsci260/HelloWorld/hello.py
Hello World!

Process finished with exit code 0
Congratulations! You’ve open and run an existing Python project in PyCharm using a Conda environment.