the ambient perspective
Now that
you have checked out your first project, you should
familiarize yourself with the workbench. You should see the Ambient
perspective (notice the name "Ambient" in the title bar). If
this is not the case, you should switch to this perspective by
selecting the Ambient in the perspective list.
elements of the workbench
There are six
main parts that are of concern for you:
- menubar at
the top of the window
- it includes the Ambient menu, which should
become very handy
- toolbar
underneath the menubar
- it provides shortcuts to functions in the menubar
that have been symbolized with icons
- Ambient
Package Explorer on the left side
- displays all projects in your workspace
- Outline
view on the bottom left side
- this will show the full structure of classes,
methods, and variables in whichever file is currently selected.
- editor on
the right side
console
window on the bottom
- will display output and allow for input when you
run programs
using the ambient package explorer
- At first,
you should only see one object (probably called "project1")
with a little plus sign in front of it. Click on the plus sign to
expand the object and see the objects it contains. Do this to all
children until the view is completely expanded. You should now see that
there are some classes listed in the default package. Notice also that
you can see an outline of the class. All data members and methods are
displayed. In order to open a class or a specific method, simply
double-click on its name.
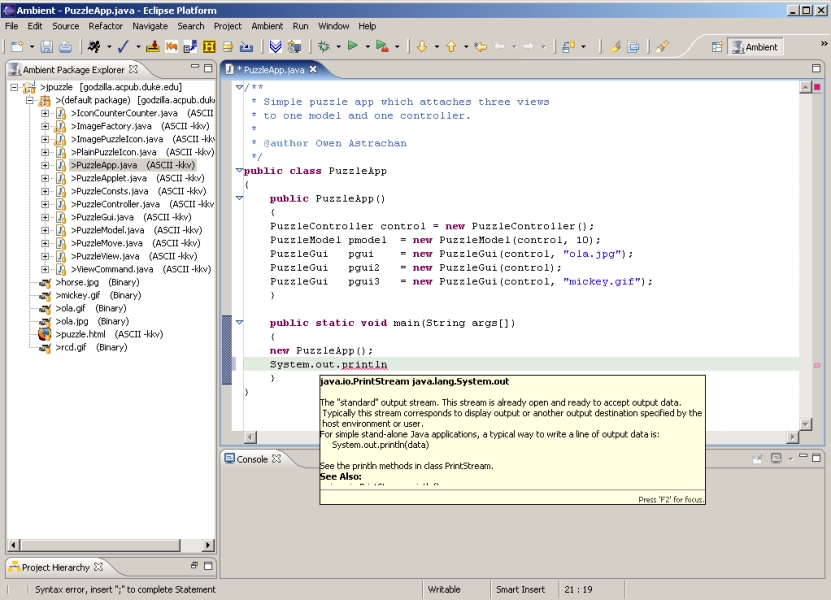
using the java editor
A Java editor
containing the file you just selected should have opened
up in the editor area on the right side. Please select Ambient
Perspective
(alternatively you may press Ctrl + Alt + P) again. This should
hide some of the menus you do not need. Using the editor is just like
using any text editor. However, there are some additional features that
should help you write programs.
By default,
the editor analyzes your code and highlights
certain elements to make it easier to read. For example, it
highlights keywords in purple, comments in light blue or light
green, and strings in blue.
When the
editor finds an expression that it does not know
how to evaluate, it will underline it with a red line. You might not
be able to run a program before all errors are fixed. If the editor
thinks a line is unnecessary, it will underline it in yellow.
Usually,
when the editor detects an error, it will also
attempt to present you with a solution. To do so, the editor will
display a yellow light blub on the left edge of the line in
which the error occured. Clicking on the bulb once will open a menu
that will offer you different solutions. Selecting one of these
solutions will immediately alter your code (however, you can always
undo the changes).
- Using
auto-completion features
There are
two coding features that should make your life a
lot easier.
- Type a
keyword or part of a keyword and press Ctrl + Space.
Eclipse will show you a list of elements that you may wish to use. For
example, if you type "for" and press the two keys simultaneously,
it will show you a list of predefined for loops. Selecting one of
them will insert the loop into your code.
- When
using member methods or data members of classes, we use the
dot operator in Java (e.g., MyFirstClass.printHelloWorld()).
Oftentimes we know that there is a method we would like to use, but
we cannot remember its exact name. If you are not sure, simple type
the name of the object you are working with followed by a period and
wait for a moment. A list will appear that shows all members that you
may use.
|