Now that you've had an introduction to HTML, it's time see the code from the initial example webpage. Here's a look at that page one more time.
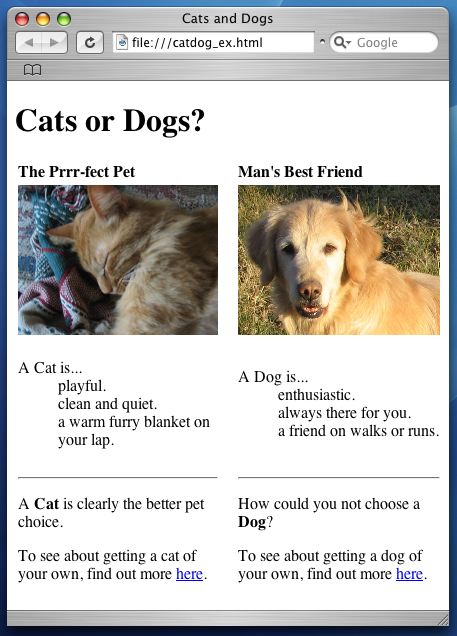
Now here's a look at the code that made that webpage, line by line.
<!DOCTYPE html PUBLIC "-//W3C//DTD XHTML 1.0 Strict//EN"
   "http://www.w3.org/TR/xhtml1/DTD/xhtml1-strict.dtd">

<!-- A webpage about dogs and cats! -->
<html>
The code first starts with a declaration about what style of HTML this document is using. Don't worry about exactly what this line does. Just know that it works. The code below that is a little more comprehensible: a comment describing what the page is about, quickly followed by the opening <html> tag. Remember that the closing </html> tag will also be the last tag in our file.
<head>
   <title>Cats and Dogs</title>
</head>
Next we put in a title element to place webpage title across the top of a web browser's window bar. Of course, this title element has to be contained within the head element.
<body>
   <h1>Cats or Dogs?</h1>
We now open up the HTML body element with the <body> tag. Recall that the body element is where we'll store all of the content we want displayed within our webpage. The first piece of content of this page is a header line created with the <h1> tag. A smaller or less important header could use one of the other 5 header tags.
<table>
<th align="left">The Prrr-fect Pet</th>
<th> </th>
<th align="left">Man's Best Friend</th>
The layout of a webpage is best handled using CSS. Since we haven't gotten to the tutorial for that yet, this page had to use a table element to organize the page into two columns. The first thing in that table is the line of table headers created with the <th> tag.
Note that the middle header uses the space character entity, , to put some spacing between the two columns we care about. The fact that we're having to use text spacing to layout this page should indicate to you that better techniques are needed (i.e. CSS).
   <tr>
      <td><img src="./graphics/cat.jpg" height="150px" /></td>
      <td></td>
      <td><img src="./graphics/dog.jpg" height="150px" /></td>
   </tr>
Next up is the first row of the table denoted with the <tr> tag. Here we're using the <img> tag to put in a couple of images. Since this HTML element only uses a single tag, the tag has to close itself with a " />" at the end. Each of those images are of course contained in their own table data element given by the <td> tag. Note that no extra spacing was needed inside the middle table data element. Since the table columns line up under their corresponding headers, adding space to only the middle table header works.
   <tr>
      <td>
      <dl>
         <dt>A Cat is...</dt>
         <dd>playful.</dd>
         <dd>clean and quiet.</dd>
         <dd>a warm furry blanket on your lap.</dd>
      </dl>
      </td>
      <td></td>
We've got more content in this second row. This bit of code opens the second row element, then contains two table data elements. The second one is blank (our middle row for spacing) while the first table data element lists some feline virtues using a definition list element, and the <dl>, <dt>, and <dd> tags.
      <dl>
         <dt>A Dog is...</dt>
         <dd>enthusiastic.</dd>
         <dd>always there for you.</dd>
         <dd>a friend on walks or runs.</dd>
      </dl>
      </td>
   </tr>
We've now got the third table data element for the second rows. This one is listing reasons to choose a dog for your pet, again with a definition list. Finally, we have to remember to close this row element with the </tr> tag.
   <tr>
      <td>
         <hr />
         <p>A <b>Cat</b> is clearly the better pet choice.</p>
         <p>To see about getting a dog of your own, find out more
            <a href="http://www.terrific-cats.com/">here</a>.</p>
      </td>
      <td></td>
This code starts the third and final row in our table page layout. We again start the row element with a <tr> tag. This time, inside of the first table data element we're using the <hr /> tag to create a horizontal line and help organize our content. Immediately below that we have one last plug for cats. Here the text "Cats" is given in bold thanks to the <b> tag, and we've created a link at the bottom using the anchor tag <a />. Finally, the last line of code creates our middle spacer table cell for this row.
      <td>
         <hr />
         <p>How could you not choose a <b>Dog</b>?  </p>
         <p>To see about getting a dog of your own, find out more
            <a href="http://www.terrificpets.com/">here</a>.</p>
      </td>
   </tr>
Our final table cell: a last request to get your own puppy pal. This table data cell is created in the same way as our previous cell for cats. Once more, the last line of code closes our row element using the </tr> tag.
   </table>
</body>
</html>
Just a tiny bit of cleanup work now. First we close the table element which we used for page layout. Then we close the body element and finally the html element. Of course, these elements must be closed in reverse of the order in which they were opened so that the element will be properly nested.
That's it! We're done. You've gotten a basic introduction to HTML programming and you're ready to make webpages of your own. After trying out some code of your own, try progressing on to the CSS tutorial to see how you can complement your HTML-structured content with beautiful presentation.